Before we get started, please note that there is now 2 types of RNIP Draw Entry elements that can be added on a page. There’s the original RNIP Draw Entry element where when used will pre-populate the left column with the default text for each row. The only information to enter into the element are the values for the right column. There is also a second RNIP Draw Entry – With Text Override element which will allow you to specify the text to be displayed in the left column for each row.
The RNIP Draw Entry element uses the following default text for the rows:
- Number of invitations issued
- Employer Stream
- Date and time of round
- Score of lowest-ranked candidate invited
- Tie-breaking rule
The RNIP Draw Element – With Text Override allows you to alter the default text above with your own specific text. It also gives you an additional text area field to add notes at the bottom of the entry.
1) First, navigate to the “Pages” section in the left navigation. Scroll down and click on “RNIP Draws” to edit the page.
2) Scroll down to the section containing the RNIP Draw entries.
3) If you’re adding a new entry, you can clone an existing item to simplify the process or add a new item.
If you choose to clone, consider the following:
- It’s usually simpler to clone the top most element for a new entry since you won’t have to move anything into position.
- Remember that there are 2 types of RNIP Draw Entry elements (ie. RNIP Draw Entry, RNIP Draw Entry – With Text Override). Begin by confirming that the element you are cloning is of the same type you need for the new entry. If it is, proceed with cloning.
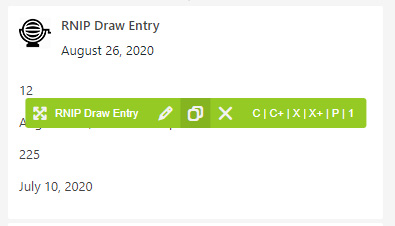
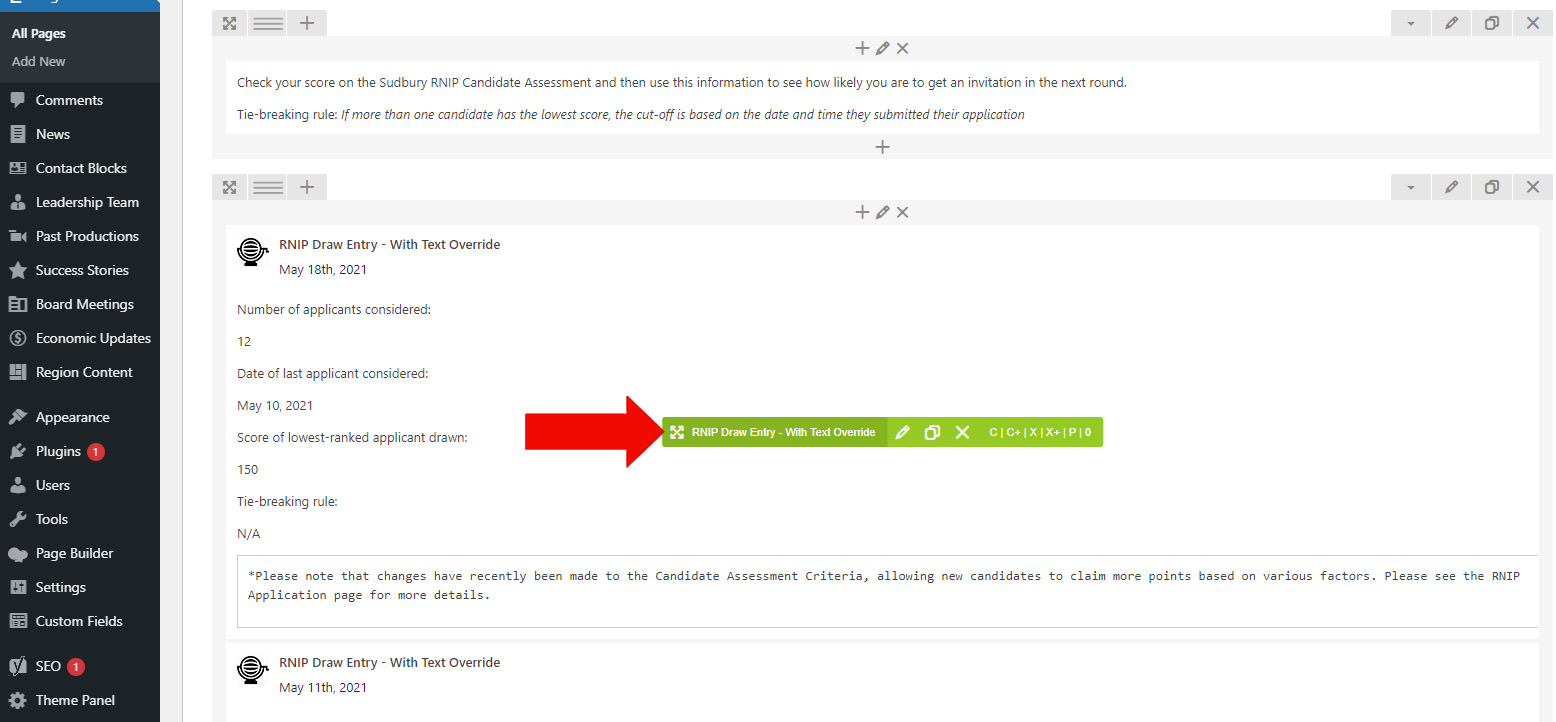
Click the clone icon in the green bar to duplicate the current item
You can also add a new item by clicking the plus icon at the bottom of the current row grouping.
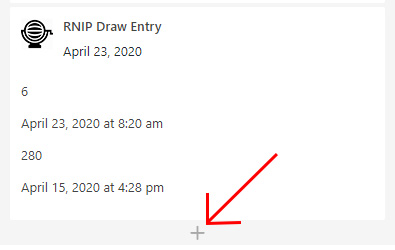
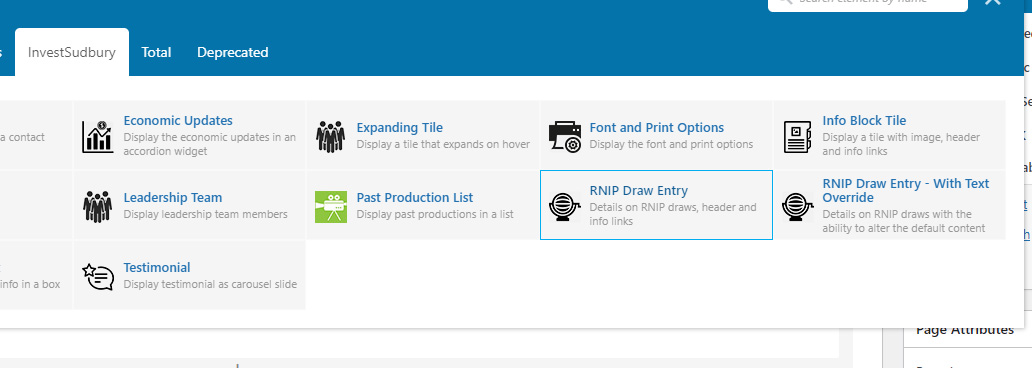
Clicking the plus icon will bring up the list of available elements.
Select the “RNIP Draw Entry” or “RNIP Draw Entry – With Text Override” element.
4) Fill in the fields and click “Save changes”.
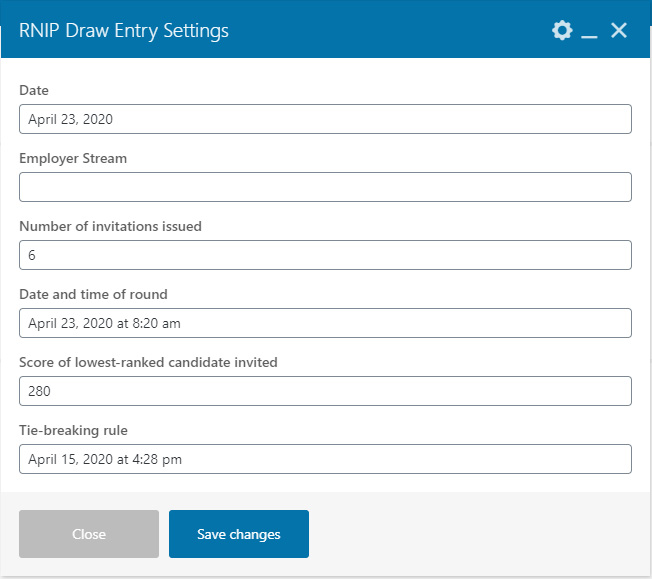
RNIP Draw Entry
- If you leave a value blank, nothing will be displayed on the page for this row.
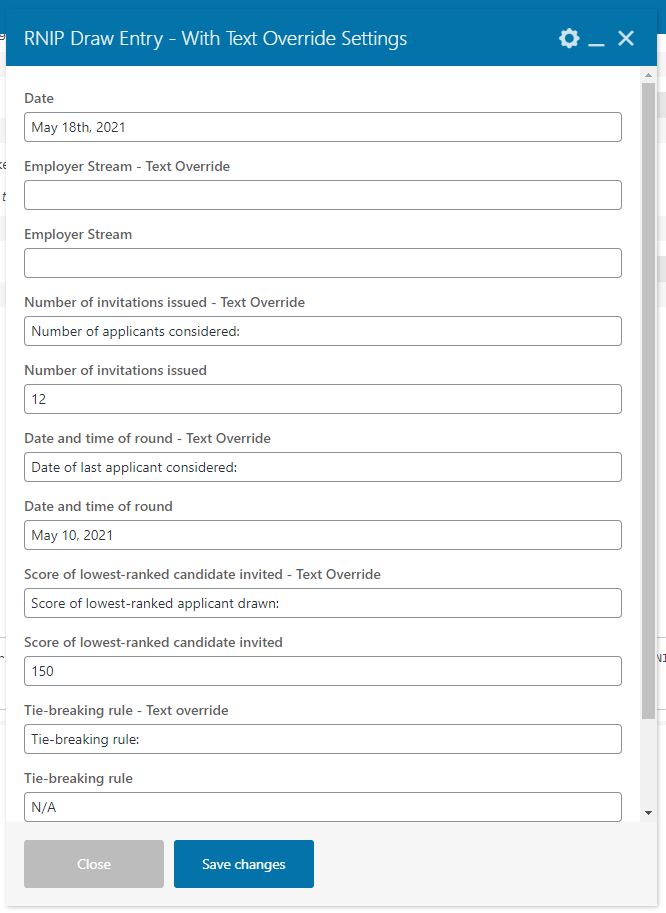
RNIP Draw Entry – With Text Override
- If you leave a value blank under any label that ends with “- Text Override”, the default text for the row will be displayed.
- If you leave a value blank for any field that is outputted in the right column of the entry, nothing will be displayed for this row.
5) You can now drag and drop the new draw entry into the right position if the entries are out of order.
- You can drag an item by hovering over it. While hovering over an RNIP Draw Entry item, a green bar will appear with icons.
- Hover over the 4 directional arrow icon in the green bar, click and hold.
- Move your mouse up or down till you reach the new location on the page you wish to place the entry item.
- Release your mouse button.
6) Save the changes to the page by clicking the “Update” button in the right sidebar.