Overwriting an image in the media library
1) Go to Media in the left navigation.
2) Find the image by searching for the file name.
3) Click on the image.
4) In the right side, click on “Upload a new file” next to “Replace media”.
5) Browse and choose a new file on your computer.
6) Verify that “Just replace the file” is the selected radio button under “Replacement Options”.
7) Click the Upload button.
8) This method may require that the WP Engine cache be purged. If you don’t see the new image when you reload a page that the image is on, you can try to clear the cache from the WordPress Admin area. Not all users have access to do this. If you do, you should see a link titled “WP Engine” as the first item in the left navigation in the admin area. If you don’t see this link, you don’t have sufficient access to perform this action.
If you do see this link, click on it. On the subsequent page, click on the “Purge All Caches” link.
You will be prompted with a message indicating that this action may take a few minutes. Click OK.
Wait a few minutes and then reload the page where the image is on.
If you still don’t see the new image, request that the WP Engine cache be cleared by Avery Burton or Gilbert Lefebvre. This must be done from within the WP Engine environment and is not available in the WordPress admin area.
Replacing an image with a new image (no overwrite)
For these instructions, we will be using the Annual Report image on the Reports and Plans page. The instructions may vary a bit depending on page builder element but in general, these instructions should be enough to help you update any image on the site.
1) Edit the page with the image that needs to be replaced. In this case, edit the Reports and Plans page.
2) Scroll down to the Info Block Tile element that says “Annual Report” below it and hover over it.
3) Click on the pencil icon in the green bar.
4) Under Tile image, click the X in the red square. This will remove the existing image.
5) Click on the square with the + icon.
6) Drag and drop the image into the media library. Add the Alt text in the field on the right.
7) Click on Set Image.
8) Click on “Save Changes”.
9) Click on Update to save the changes to the page.
Replacing a background image (no overwrite)
These instructions are to replace a background image such as the images for banner areas.
1) Edit the page with the background image that needs to be replaced.
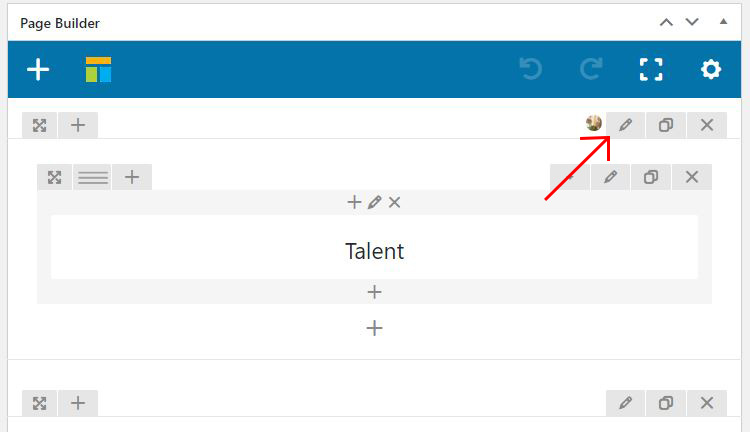
2) Scroll down to the section with the background image.
3) Click on the pencil icon for the section.

4) Click on the 3 dots (…) to the right of the Section Settings modal to reveal the flyout menu. Click on “Design Options” link.
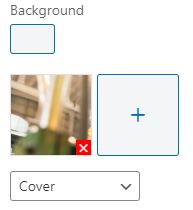
5) Under “Background” on the right side of the modal, click the X in the red square at the bottom right of the preview image. This will remove the existing image.

6) Click on the square with the + icon.
7) Drag and drop the image into the media library. Adding the alt text in the field on the right is optional in this case as the image is a background image and the alt attribute is not used in this case.
8) Click on Set Image.
9) Click on “Save Changes”.
10) Click on Update to save the changes to the page.